雖然這篇BUBBLES鄉民發文沒有被收入到精華區:在BUBBLES這個話題中,我們另外找到其它相關的精選爆讚文章
在 bubbles產品中有2330篇Facebook貼文,粉絲數超過0的網紅,也在其Facebook貼文中提到, ...
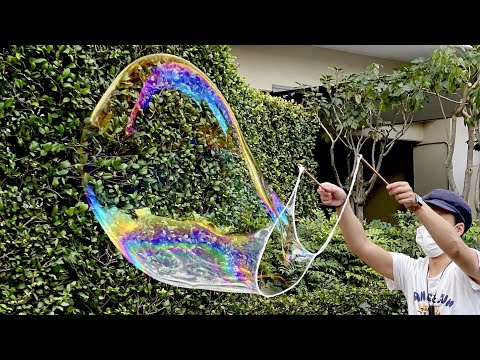
同時也有1198部Youtube影片,追蹤數超過92萬的網紅ochikeron,也在其Youtube影片中提到,Here is the bubble solution recipe to make giant bubbles 😊 My darling made a bubble wand with two long chopsticks for cooking and knitting yarn, btw....
「bubbles」的推薦目錄
- 關於bubbles 在 早川渚紗 Instagram 的最讚貼文
- 關於bubbles 在 ? Instagram 的最讚貼文
- 關於bubbles 在 Jovin Chan? Instagram 的最讚貼文
- 關於bubbles 在 Facebook 的最佳貼文
- 關於bubbles 在 Facebook 的最佳解答
- 關於bubbles 在 Facebook 的最讚貼文
- 關於bubbles 在 ochikeron Youtube 的最讚貼文
- 關於bubbles 在 生かし屋 IKASHIYA CULINARY ART Youtube 的最讚貼文
- 關於bubbles 在 cook kafemaru Youtube 的精選貼文
bubbles 在 早川渚紗 Instagram 的最讚貼文
2021-09-24 18:35:54
. このワンピかわいい〜❤︎ 背中があいてるの!! . . . #ミニワンピース #meltthelady #bubblestokyo #bubbles #厚底ブーツ #ハーフツインアレンジ #ハーフツイン #fashion #バックオープンワンピース #バックオープン...
bubbles 在 ? Instagram 的最讚貼文
2021-09-24 08:50:40
Immortelle Reset Oil-in Serum เซรั่มกันโทรม สูตรใหม่! เข้มข้นขึ้นกว่า 20% ด้วย Organic Immortelle Essential Oil 10เท่า ช่วยบำรุงผิวได้ล้ำลึก แต่ไม่เหน...
bubbles 在 Jovin Chan? Instagram 的最讚貼文
2021-09-24 11:38:56
初为人母 – 真的又兴奋又压力啊! 压力是生活作息完全不一样了,日夜颠倒,皮肤也给搞砸了!😔 还好我有救星:L’Occitane’s Immortelle Reset Oil-in-Serum #星光瓶 ✨✨ 它拥有独特的双重质地,还蕴含了天然精萃精华,3000颗的 Golden Bubbles与超...
-
bubbles 在 ochikeron Youtube 的最讚貼文
2021-09-22 19:36:53Here is the bubble solution recipe to make giant bubbles 😊
My darling made a bubble wand with two long chopsticks for cooking and knitting yarn, btw.
Of course you can use any bubble wand!
Enjoy💕
---------------------------------
How to Make Giant Bubbles that won't Pop Easily (Homemade Bubble Solution Recipe)
Difficulty: Very Easy
Time: 3min
Number of servings: 550ml
Ingredients:
1 tbsp. granulated sugar
400ml boiled tap water (high purity water is better)
100ml laundry starch PVA (you can get it at DAISO 100yen shop)
50ml dishwashing liquid (surfactant around 40% increases durability)
Directions:
1. In a bottle, put granulated sugar and water. Shake to mix well. Dissolve the sugar completely.
2. pour in laundry starch and dishwashing liquid, then shake gently to mix.
レシピ(日本語)
https://cooklabo.blogspot.com/2021/09/Giant-Bubbles.html
---------------------------------
Music by
YouTube Audio Library
Follow me on social media. If you have recreated any of my food, you can share some pictures #ochikeron. I am always happy to see them.
♥FOLLOW ME HERE♥
http://instagram.com/ochikeron/
https://www.facebook.com/ochikeron
https://plus.google.com/+ochikeron
http://twitter.com/ochikeron
♥My COOKBOOK available on Amazon Kindle♥
http://amzn.to/2EwR3ah
NO MORE hard copies... those who got one are lucky!
♥More Written Recipes are on my BLOG♥
http://createeathappy.blogspot.com/
♥My Recipe Posts in Japanese♥
http://cooklabo.blogspot.jp/
http://cookpad.com/ami
http://twitter.com/alohaforever
♥and of course PLEASE SUBSCRIBE♥
http://www.youtube.com/user/ochikeron?sub_confirmation=1![post-title]()
-
bubbles 在 生かし屋 IKASHIYA CULINARY ART Youtube 的最讚貼文
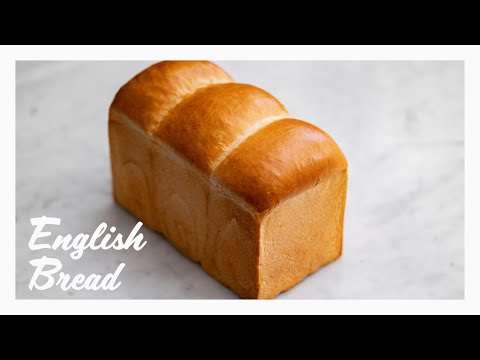
2021-09-03 18:36:29ストレート法で作る基本の山食パン(山型食パン・イギリス食パン)の作り方です
ストレート法は最初から材料をすべて合わせる作り方で、
メリット:短時間で出来る、風味が良い
デメリット:ボリュームが出にくい、でんぷんの老化がはやい=すぐぱさつく
という特徴があります
おすすめの強力粉は窯伸びの良い「スーパーキングやゴールデンヨット」、老化が遅く風味もいいし窯伸びもいいし作業もしやすい「ベルムーラン」がおすすめです(動画ではベルムーランを使用)
【型生地比容積について】
自分の持っている型に合わせて生地量を調整します
1.5斤と書かれてても1.2斤しかなかったり、型によって全然違うので必須です
この型と容量と生地の比率を型生地比容積といいます
型の容量÷型生地比容積=生地量
例:1625ml(1斤弱)÷3.5=約464g
3つに分けて入れる場合は1つあたり464÷3=155gになります
型生地比容積の目安
角食:3.8~4
山食:3.6前後
(数字が大きいほどふわふわで、数字が小さいほどみっちり)
ベーカーズパーセントと比容積からレシピの調整も出来ますが、
計算が面倒なので粉300gとか多めに作って生地量を食パンに使い
残りの生地は丸パンなどにすると楽だし無駄になりません
型生地比容積についてより詳しくは↓
https://www.ikashiya.com/entry/katakiji-hiyouseki
【材料】
ベーカーズパーセント(合計:194)
・強力粉 100
・砂糖 8
・スキムミルク 3
・塩 2
・インスタントドライイースト 1
・水 72
・バター 8
粉300での分量(1斤目安)
・強力粉 300g
・砂糖 24g
・スキムミルク 9g
・塩 6g
・インスタントドライイースト 3g
・水 216g
・バター 24g
【準備】
・バターを常温においておく
・型に離型油を塗る
【作り方】
1. 【生地作り~1次発酵】バター以外の材料をすべて合わせてグルテン膜が出るまでこね、バターを加えてさらにこねる
2. より薄いグルテン膜が出るまでこね(こね上げ26℃目安)、丸めてボウルに入れてラップをし30℃で60分発酵させて、打ち粉をして台に取り出す
3. 上から押さえてガスを抜いて広げ、上下左右から3つ折り×2で折りたたみボウルに入れてラップをし、30℃で30分発酵させる
4. 【分割~ベンチタイム】生地量の1/3ずつに分割してガスを抜き、きれいな面が外側にし表面を張らせるように丸める
5. かたく絞った濡れ布巾をかけて25分ベンチタイム(生地をゆるめて成形しやすくする/残った生地は同様にして丸パンなどに活用)
6. 【成形~2次発酵】めん棒で長方形にのばしつつガスを抜き(周りの気泡は手で潰す)、上下から1/3折りたたんで生地をくっつける
7. 奥から手前に少し張らせるように巻いてとじる(最初芯を作り、トップを持って下にくっつけるイメージで3回転~3回転半)
8. 離型油を塗った型に端→真ん中の順で入れ、蓋をして35℃で50分を目安に2次発酵(オーブンで発酵させる場合は予熱時間を考慮しはやめに取り出す)
9. 【焼成/180℃に予熱】生地が型のギリギリまで膨らんだら発酵完了、180℃に予熱したオーブンで焼成する
10. 180℃で30分を目安に焼き、焼き上がったら台に2~3回落として蒸気を抜き(腰折れを防ぐため)、すぐに取り出し冷ます
--------------------------------------------------------------------------
【動画でよく使ってる調理器具】
フライパン(20cm):https://amzn.to/2QyY1ny
フライパン(24cm):https://amzn.to/2UtNvz5
フライパン(24cm深型):https://amzn.to/3dj5DEp
鉄フライパン(22cm):https://amzn.to/3a8hqmR
アルミフライパン(24cm):https://amzn.to/3dj6tRz
片手浅型鍋(18cm):https://amzn.to/2QzGXha
片手浅型鍋(21cm):https://amzn.to/2U7ta3o
片手鍋(16cm):https://amzn.to/2QzCj2x
片手鍋(20cm):https://amzn.to/3bd0lZa
ソースパン:https://amzn.to/2U9keuI
まな板:https://amzn.to/2J1fQHI
ガスコンロ:https://amzn.to/3bdtvYa
牛刀:https://www.jikko.jp/fs/jikko/54803
ペティ:https://www.jikko.jp/fs/jikko/54800
撮影機材
カメラボディ:https://amzn.to/2xSXZAd
動画レンズ:https://amzn.to/3t7sfPB
写真レンズ:https://amzn.to/2U7HcCb
録音:https://amzn.to/2U9cGYT
※製品のURLはAmazonアソシエイトのリンクを使用しています
--------------------------------------------------------------------------
▼サブチャンネル(料理実験チャンネル)
https://www.youtube.com/channel/UCqIW0OHh8k2np5ZNz3wz8sg
▼ブログ
http://www.ikashiya.com/
▼Twitter
https://twitter.com/sakihirocl
▼Instagram
https://www.instagram.com/sakiyamahiroshi/
--------------------------------------------------------------------------
↓using translation software.
[Ingredients]
Bakers percent (total: 194)
・Bread flour 100
・Sugar 8
・Skim Milk 3
・Salt 2
・Instant dry yeast 1
・Water 72
・Butter 8
The amount of the flour 300.
・Bread flour 300 g
・Sugar 24 g
・Skim milk 9g
・Salt 6g
・Instant dry yeast 3g
・Water 216 g
・Butter 24 g
[Preparation]
・Leave the butter at room temperature.
・Spread mold release oil on the mold.
[How to make]
1. [Making the dough ~ primary fermentation] Mix all the ingredients except butter and knead it until the gluten film comes out. Add butter and knead it more.
2. Knead it (knead it up to around 26 °C) until a thinner gluten film comes out. Round it and put it in a bowl. Cover it with a plastic wrap and let it ferment for 60 minutes at 30 °C. Dust it with flour and take it out on a counter top.
3. Press down from the top to release the gas and spread it out. Fold it 3 times from top, bottom, left and right. Put it in a bowl and wrap it then ferment it for 30 minutes at 30 °C.
4. [Divide ~ bench time] Divide it to 1/3 of the amount of the dough then release the gas. Round it so the clean side is on the outside and the surface will stretch.
5. Cover it with a tightly squeezed damp dishcloth and bench it for 25 minutes (loosen the dough to make it easier to shape it/use the rest of the dough in the same way for round bread, etc.).
6. [Shaping ~ Secondary fermentation] Stretch it to a rectangle with a rolling pin and release the gas (crush the air bubbles around it with your hand). Fold it from the top and bottom to 1/3 and stick the dough together.
7. Roll it up and close it so that it is slightly stretched from the back to the front (Make the core first and hold the top and stick it on the bottom. Turn it around 3-3.5 times.).
8. Put it in the mold spread with mold release oil in the order of the edge to the center. Cover the lid and let it undergo secondary fermentation at 35 °C for around 50 minutes (take it out without considering the preheating time if you are fermenting it in the oven).
9. [Bake/Preheat to 180 °C] When the dough rises to the edge of the mold, the fermentation is complete. Bake it in the oven preheated to 180 °C.
10.Bake it at 180 °C for around 30 minutes. When it finishes baking, drop it on a counter 2 ~ 3 times to remove the steam (to prevent it from breaking around the waist). Take it out immediately and let it cool.![post-title]()
-
bubbles 在 cook kafemaru Youtube 的精選貼文
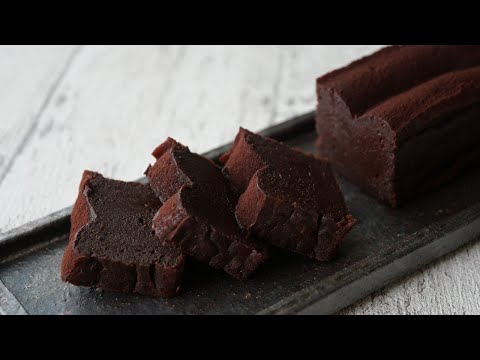
2021-09-03 18:19:27気温が少し下がったら、無性にガトーショコラが食べたくなりました。買い置きの生クリームが無かったので、バターと卵とチョコレートで、作ってみたんですが、濃厚で甘さ控えめで満足~^^
まったりとしたチョコケーキがお口の中でとろけます。
気持ちも落ち着いたので、これからスクワット10回します!!!
最近始めた決め事。甘いもの食べたらスクワット10回♡
れしぴは下にあります。
フォロー&いいね! も お願いします!!!!!!
twitter
https://twitter.com/cookkafemaru
instagram
https://www.instagram.com/kafemaru/?hl=ja
Blogブログ始めました。
右も左も分からずまだまだですが、毎日すこしずつ、まとめつつ書いています、良かったら遊びにきてください^^
https://ameblo.jp/28280807
==================================================
大人気YouTuber “cook kafemaru”の
「罪深いスイーツ」
Amazonはこちらから購入できます↓↓↓
https://www.amazon.co.jp//dp/4046048948/
「世界一作りやすいおうちスイーツ 」
https://www.amazon.co.jp/dp/4046045116/
もしもお住いの近くの本屋さんになかったら、セブンイレブンの
オムニ7でネット予約し、セブンイレブン店頭受け取りで買うことができます!
=============================================
【Ingredients】22×H5cm loaf pan
2 Eggs(100g)*room temperature
150g Dark chocolate
50g Melted butter(Unsalted butter)
*Cocoa powder
【Directions】
Preparation: Beat the egg well.
Line the cake pan with parchment paper.
Preheat the oven to 320°F/ 160℃.
①Chop the chocolate.
②Put chocolate in a bowl and melt it at a double-boiler.
③Stir melt the chocolate completely.
④Add butter and mix well.
⑤Add the beaten eggs little by little and mix well.
⑥Pour the mixture into the cake pan.
To get air bubbles out, drop the pan lightly a few times.
⑦Preheat the oven at 320°F/ 160℃ and bake it for 20-22min.
⑧When it's baked, get it out of the pan and cool it.
***When it's cool, sprinkle cocoa powder on top and serve!
【材料】22×H5cm パウンド型
卵(M)2個 (100g)*室温
ビターチョコレート 150g
溶かしバター(無塩) 50g
*ココアパウダー
【作り方】
準備
卵はよく溶いておく。
型にはパーチメントペーパーを敷いておく。
オーブンは160℃に温めておく。
①チョコは板チョコなどの時は溶けやすくするため、刻むか、手で小さ目に折っておく。
②チョコをボウルに入れて湯煎で溶かす。
③ゆっくりと混ぜてチョコレートを完全に溶かす。
④溶かしバターを加えてよく混ぜる。
⑤溶き卵を加えて混ぜる。
⑥パウンド型に生地を流し入れる。空気抜きのために型をとんとんと何度か落とす。
⑦160℃に予熱したオーブンで20-22分ほど焼く。
⑧焼きあがったら、型から取り出し、冷ます。
お好みで完全に冷めたらココアをふります!
***バターを使っているので、冷蔵庫保管の場合は生地がしまって固くなりますので、室温に戻してからどうぞ^^
***オーブンの機種によって焼き上がりが変わりますので、普段からレシピ本などの指定の温度では焼き上がりが甘いなどと感じていらっしゃる方は170℃で焼いて下さい。
ただし焼きすぎないようにしましょう。
***甘い方がお好みの方はミルクチョコレートを使うか、またはビターチョコを溶かした後にグラニュー糖を30g加えて甘みをプラスしてください。
***パウンド型は今回スリム型を使っていますが、お持ちでない場合は、多少高さは変わりますが、18cmの大きさでも焼けます。
丸型で焼きたいときは12cmで。![post-title]()


bubbles 在 Facebook 的最佳貼文
bubbles 在 Facebook 的最佳解答
《吹泡泡的人》-續
相隔3天,再次經過家附近的橋,赫然發現那位在橋上對著船隻吹泡泡的黑人大叔已經截然不同。
只見他表情更興奮,手舞足蹈得更起勁,身邊圍繞的泡泡更比平常多出了足足好幾倍!
定睛一看,發現他手上的道具已經升級,從自然風吹的泡泡棒,變成了自動送風的泡泡槍。
竟然是泡泡槍!
只見大量彈藥泡泡源源不絕地從槍口炸出。短短時日,在黑人大叔手裡見證了泡泡自動化過程,令我啼笑皆非。
那把槍是怎麼來的?是某人送給大叔的?還是斗內給大叔買的?是路人送的?還是導覽船上的遊客送的?抑或是大叔自掏腰包送給自己的呢?
以上答案在美國皆有可能成立。總之,無論是誰,買泡泡槍的人一定很開心,一定是真心認為大叔手上應該要擁有它。
大城市的平凡故事留下了一點遐想,在這座威廉法黑橋上。
大叔的泡泡愈飄愈遠,除了河面,也飄到了河堤步道上。
“Wow, bubbles~” 看見的人們指著說。
如果一個泡泡代表一個生命中的微小祝福與希望,那麼,更多人的心房都會在這座城市一隅之處被微微點亮。
#芝加哥沙舟
bubbles 在 Facebook 的最讚貼文