雖然這篇手動打蛋器鄉民發文沒有被收入到精華區:在手動打蛋器這個話題中,我們另外找到其它相關的精選爆讚文章
在 手動打蛋器產品中有117篇Facebook貼文,粉絲數超過0的網紅,也在其Facebook貼文中提到, 今日卒之切喇 開呀! 唉呀!冇劃走入模泡🤣 講過切開會有食譜 鮮檸蜜戚風 (6吋份) 工具 大碗兩個 芝士刨 水果刀 手動打蛋器 電動打蛋器 矽膠刮 六吋戚風蛋糕模 (有煙囪) 焗爐😂  材料 A部份 菜油45g 低筋麵粉60g 蛋黃 3隻 新鮮檸檬汁 約20-25g (約半個檸檬) ...
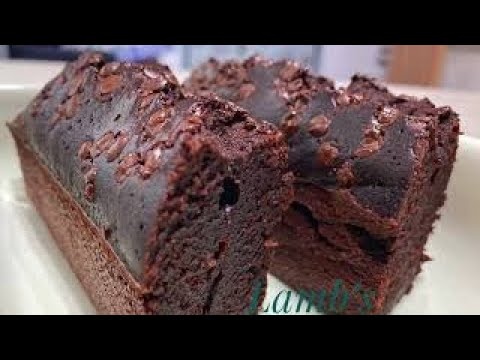
同時也有6部Youtube影片,追蹤數超過605的網紅GoodMorrningLamb早安呀羊咩咩,也在其Youtube影片中提到,羊咩咩雙重朱古力咖啡蛋糕 ???半星級難度 10星級美味? 地獄廚神係平反嘅好機會呀? 材料 1,預拌包:材料包1、材料包2、材料包 3 2,自備材料共4項:雞蛋 1 隻、植物油 60g/67ml(無味、液體)、雲呢拿油及溫水175g/ml 工具 模具:選用自己的模具或入爐紙杯 器皿:直徑1...
「手動打蛋器」的推薦目錄
- 關於手動打蛋器 在 KeiKei 。Food heal。Words heal Instagram 的最佳貼文
- 關於手動打蛋器 在 喣喬麻麻 Instagram 的最佳貼文
- 關於手動打蛋器 在 喣喬麻麻 Instagram 的精選貼文
- 關於手動打蛋器 在 Facebook 的最佳貼文
- 關於手動打蛋器 在 Facebook 的最佳解答
- 關於手動打蛋器 在 肥媽 Maria cordero Facebook 的精選貼文
- 關於手動打蛋器 在 GoodMorrningLamb早安呀羊咩咩 Youtube 的最佳貼文
- 關於手動打蛋器 在 Yanyeunggg Youtube 的最佳貼文
- 關於手動打蛋器 在 Chris Wong Private Kitchen Cooking Channel Youtube 的最讚貼文
手動打蛋器 在 KeiKei 。Food heal。Words heal Instagram 的最佳貼文
2021-09-10 12:42:42
Bosch MUM Series 2 「烘焙易」廚師機 👩🏻🍳 識我嘅朋友仔都知我會整下甜品仔,間吾時會有啲手殘劣作 🤡 其實真係想入部廚師機,有機會可以試用下好開心🤩 呢部Bosch烘焙易廚師機真係好岩新手!吾使再用手動打蛋器,要拎住唔咁唔方便。而家可以安心俾廚師機打蛋白同搞麵團,輕輕鬆鬆等食😛...
手動打蛋器 在 喣喬麻麻 Instagram 的最佳貼文
2021-09-10 20:27:44
#波士頓派 戚風蛋糕夾上鮮奶油的概念 第一次烤,這樣的成果已經很可以😆 Boston Pie is the concept of chiffon cake with whipped cream. Baked for the first time, such result is already ve...
手動打蛋器 在 喣喬麻麻 Instagram 的精選貼文
2021-09-10 20:27:44
#黑芝麻瑪德蓮 #瑪德蓮蛋糕 今天烤的蛋糕,食譜是我自己編改過的,為了配合12連的瑪德蓮模具,提供大家參考。如果要烤原味的瑪德蓮,只要把黑芝麻粉去掉,低筋麵粉改成80g就可以了。 食材: 全蛋egg 2顆(室溫) 糖sugar 50g 低筋麵粉cake flour 70g(過篩) 黑芝麻粉bl...
-
手動打蛋器 在 GoodMorrningLamb早安呀羊咩咩 Youtube 的最佳貼文
2020-07-11 12:21:47羊咩咩雙重朱古力咖啡蛋糕
???半星級難度
10星級美味?
地獄廚神係平反嘅好機會呀?
材料
1,預拌包:材料包1、材料包2、材料包 3
2,自備材料共4項:雞蛋 1 隻、植物油 60g/67ml(無味、液體)、雲呢拿油及溫水175g/ml
工具
模具:選用自己的模具或入爐紙杯
器皿:直徑18cm以上的大碗 2 個
攪拌:磅/量杯、手動打蛋器、膠刮
爐具:焗爐![post-title]()
-
手動打蛋器 在 Yanyeunggg Youtube 的最佳貼文
2020-04-06 00:06:32韓國網紅既400次咖啡 如果用打蛋器應該係會打到手斷
所以我懶都係用好耐好耐好耐以前係ikea買既電動打奶泡器
快啲一齊試下整啦~
不過我唔知道唔可以有奶既成份
所以你地整記住都唔好落奶啊!!!!!
材料:
即溶咖啡粉 3 tbsp
糖 3 tbsp
水 3 tbsp
奶 視乎杯大細
冰 少量
用具:
手動打蛋器
電動打奶泡器 (懶人專用)
▪ ▫ ▪ ▫ ▪ ▫ ▪ ▫ ▪ ▫ ▪ ▫ ▪ ▫ ▪ ▫ ▪ ▫ ▪ ▫ ▪ ▫ ▪ ▫ ▪ ▫ ▪ ▫ ▪ ▫ ▪ ▫ ▪ ▫ ▪ ▫ ▪ ▫ ▪ ▫ ▪ ▫ ▪ ▫ ▪ ▫ ▪ ▫ ▪
⁂ C a m e r a → Sony A5100
⁂ E d i t i n g → Inshot
▪ ▫ ▪ ▫ ▪ ▫ ▪ ▫ ▪ ▫ ▪ ▫ ▪ ▫ ▪ ▫ ▪ ▫ ▪ ▫ ▪ ▫ ▪ ▫ ▪ ▫ ▪ ▫ ▪ ▫ ▪ ▫ ▪ ▫ ▪ ▫ ▪ ▫ ▪ ▫ ▪ ▫ ▪ ▫ ▪ ▫ ▪ ▫ ▪
➱ 訂 閱
⦠ Y o u t u b e ► https://www.youtube.com/user/emilyyty0925
⦠ F a c e b o o k ► http://www.facebook.com/emily.yty
⦠ I n s t a g r a m
► 狗 奴 媽 媽 ?♡ https://instagram.com/yanyeunggg
► 狗 寶 寶 ? https://instagram.com/belbelbellllllll![post-title]()
-
手動打蛋器 在 Chris Wong Private Kitchen Cooking Channel Youtube 的最讚貼文
2020-03-26 17:30:00FACEBOOK PAGE @我的C家廚房!Bon Appétit
https://www.facebook.com/MyPrivateKitchen.Chriswong/
?網美~文青風~咖啡吐司組合【芋泥玉子燒吐司 】配 ??韓風【400次咖啡· Dalgona Coffee ·焦糖咖啡奶蓋 】。
?芋頭控必收藏!綿密扎實的芋泥玉子燒吐司,精緻美味,滿瀉的餡料看著就已經很療癒~ 要多拍幾張照才捨得把吐司放進口裡。☺️
近期大熱的【400次· Dalgona Coffee ·焦糖咖啡奶蓋 】為什麼會在韓國火速爆紅呢?因為韓綜「新商品對決便利餐廳」,嘉賓丁一宇到澳門隱世茶檔「漢記咖啡」品嚐由漢叔手打400次才能出現綿密如雲朵般的咖啡而驚嘆。製作過程、形態、味道也跟韓國路邊焦糖餅Dalgona (달고나 )很相似,因此被韓國人稱為Dalgona Coffee。
節目過後,不少韓星、歌手、網民們都紛紛跟著漢叔的咖啡去做,連金英光、姜丹尼爾也大讚好喝~ 大家不妨這個週末,在家做做這個 ?? #網美 #文青風 #咖啡吐司組合 #芋泥玉子燒吐司 #dalgonacoffee #焦糖咖啡奶蓋 #焦糖奶蓋咖啡 #咖啡焦糖奶蓋(食譜如下,謝謝)??
【芋泥玉子燒吐司 】
芋泥材料:-
芋頭.................470g
砂糖.................70g
牛奶.................70ml
無鹽牛油.........35g
玉子燒材料:-
雞蛋.................4-5隻
味醂..................1茶匙
鹽.....................少許
做法:-
1. 芋頭切片,放入熱鍋內蒸18分鐘後拿出,加入砂糖、牛奶、牛油用電動攪拌機打至均勻幼滑備用。
2. 雞蛋打發成蛋液,加入味醂、鹽拌勻。
3. 熱油鍋下1/4份蛋液以小火煎至凝固後,從鍋邊把蛋捲起至尾端,然後在蛋卷旁邊加入1/4份蛋液,重複以上步驟,把餘下之蛋液加入鍋內捲起便可。
4. 完成後之玉子燒可用烘焙紙包裹著,可使玉子燒外型更加漂亮。
5. 將適量芋泥、玉子燒放在吐司上便可。
小貼士:-
如喜歡帶甜一點的玉子燒可加入適量砂糖。(這次的玉子燒我是配甜的芋泥做吐司的,所以糖可以去掉)
【400次咖啡· Dalgona Coffee ·焦糖咖啡奶蓋 】
材料:-
即溶咖啡..............2湯匙
白砂糖..................2湯匙
室溫食用水..........2湯匙
做法:-
1. 將即用咖啡、白砂糖、室溫食用水混合(水續少加入更易控制),然後用手動打蛋器打成綿密泡沫狀。
2. 杯子放入冰塊、牛奶,然後加入焦糖咖啡泡沫便可。
後記:-
1. 小湯匙、手動打蛋器、電動打蛋器均可打出綿密泡沫狀。(三種方法我都已經親身試過,也成功了)?
2. 如用小湯匙去打的話,泡沫顏色深一些,有咖啡油的外觀。(這是最original 的方法,手酸感強,泡沫沒有豐厚感,呈泡沫半液狀態)
3. 用手動打蛋器比小湯匙快成型,還是會感受到400次DIY之體驗,泡沫顏色恰到好處,吃起來很輕柔。(約8分30秒便成功..但是手也是酸酸的...)
4. 電動打蛋器以時間取勝,大概不到3分鐘便可以成型,顏色像Bailey,泡沫更輕柔。(感覺很輕鬆方便)![post-title]()


手動打蛋器 在 Facebook 的最佳貼文
今日卒之切喇
開呀!
唉呀!冇劃走入模泡🤣
講過切開會有食譜
鮮檸蜜戚風
(6吋份)
工具
大碗兩個
芝士刨
水果刀
手動打蛋器
電動打蛋器
矽膠刮
六吋戚風蛋糕模 (有煙囪)
焗爐😂

材料
A部份
菜油45g
低筋麵粉60g
蛋黃 3隻
新鮮檸檬汁 約20-25g (約半個檸檬)
新鮮檸檬皮 1個 (只是鮮黃色部份,芝士刨在表面磨一下,黃色的檬青一共只有2.5-3g)
烘焙蜂蜜15至20 g
海鹽 一小撮 (要夾硬俾個重量的話🙄0.3g⚖️慢慢量,我就咁兩隻牛指㨆
B部份
蛋白 3隻(總之夾埋3隻中至大蛋)
上白糖 30g
做法
1,預熱焗爐上下火攝氏160度
2,先將麵粉及油混合,再把A部份餘下材料加入混合
3,B部份~打蛋白及跟第2部份☝️混合,細節有片睇 https://youtu.be/MuMd3blPov8
3,入模,模放在焗爐盤上再放進焗爐,焗大約35-38分鐘,如太接近上火,蛋糕模上方要放一片錫紙擋一擋,到出爐前約8-10分鐘取開讓蛋糕上色
*爐溫及時間只作參考
今次貪得意用咗先油法😅切開🥳不錯,柔較潤滑,但仍是喜歡先乳化後下麵粉的口感(見連結片做法)
冇事我返去面壁思過先
多謝圍觀
#切蛋糕把刀好重要 #切口岩巉 #失敗中嘅失敗 #做乜有把好刀唔用走去擸把水果刀🤦🏻♀️ #發神經 #GoodMorningLamb #早安呀羊咩咩 #LambsBaking #羊咩咩烘焙 #甩轆日常 #加油💪
手動打蛋器 在 Facebook 的最佳解答
過年知道大家都好想我較蒸糕,今次教大家椰汁年糕,我依個版本同傳統有小小唔同, 想知點整就記得睇了,記得交功課呀😁
高清版:https://youtu.be/9EWgIo9y6MQ
椰汁年糕
材料:
📌糯米粉225克
📌沾米粉37克
📌澄麵30克
📌片糖200克大约2片多小小(要弄碎些比较容易煮得溶)
📌水210克
📌椰奶120毫升
📌oil 30克
📌錫纸盆掃上油
📌鍚紙一張
📌紅棗一粒
做法:
1. 先用小火在210g 水中煮溶所有
片糖後, 待涼
2. 將三種麵粉全部一起過篩, 並可
混合在一起備用
3. 將(1)的糖水過篩, 如未涼攪幾下
来降温後才加入椰奶
4. 將(2)的麵粉中間整個洞, 將糖水
分多次慢慢加入及每次攪匀了再
加入另一次
5. 加油入粉漿内可用手動打蛋器或
攪拌機攪至粉漿平滑直至没有粉
粒
6. 讓攪匀的粉漿静止20分鐘(可以
幫助麵粉吸入水份)
7. 將粉漿再次撹匀,然後再過篩倒
入蒸盆, 蓋上錫紙
8. 用蒸爐100度蒸1至1.5小時視乎
粉漿厚度. 如用明火蒸, 大火滾
起後, 用中大火蒸. 注意⚠️不要
太猛火否則容易會有洞在年糕面
蒸完加一粒紅棗在中間, 完成!
肥媽 Maria Cordero
YouTube Live – January 26, 2021 Recipe English Version
Simplified Coconut Chinese New Year Cake (“Nian Gao”)
Flour Ingredients:
Glutinous rice flour - 225g
Wheat starch (“Teng Mein”) - 30g (or replace with cornflour)
Rice flour - 37g
These flours combination will not give you a sticky and hard texture. It will be soft, bouncy, and chewy the next day instead of hard and sticky.
If you wish the make the traditional version, just omit the wheat starch (“Teng Mein”) and rice flour from the recipe and the rest remain the same.
Sweetener ingredient:
Chinese dark brown sugar - 200g or about 2 slabs (break into small pieces so they melt faster)
Liquid ingredients:
Water - 210g
Coconut milk - 120g (for more intense coconut flavor you can use coconut cream)
Oil - 30g or about 2 ½ tbsp
Garnish ingredient:
Chinese red date
Other utensils:
Sifter
Spatula
Whisk
Stand mixer – optional
Balloon whisk - optional
Oiled steam proof pan for steaming
Toothpick
Foil paper or plate to cover the pan
Methods:
1. In a large mixing bowl, you MUST SIFT the glutinous flour, rice flour, wheat starch (“Teng Mein”) into the bowl and mix well. Make a hole in the center. Set aside. This is your flour mixture.
2. In a cooking pot, add in Chinese dark brown sugar pieces, water, and turn on LOW heat to melt the sugar. DO NOT use high heat because it will evaporate the water.
3. Once it starts to boil, TURN OFF the heat and keep stirring to speed up the melting process.
4. Pour the melted sugar through a sifter into a large bowl to make sure there are no hard lumps of sugar left and MUST let it stand to cool to room temperature before mixing with other ingredients. Keep stirring to speed up the cooling process.
5. Once it is almost cool, add in the coconut milk. Mix well. This is your liquid mixture.
6. Add ONLY about ¼ of a cup of the liquid mixture into the well of the flour mixture prepared in Step 1.
7. Mix well with a spatula until all the liquid is absorbed into the flour. Continue with the rest of the liquid mixture by adding about ¼ cup at a time into the flour mixture and mix well before adding the next ¼ cup of liquid mixture. Be patience. **DO NOT add all the liquid into the flour at once.**
8. Once all liquid mixture has been mixed in with the flour, give a final good mix with a whisk and making sure there is no dry flour left.
9. Add the oil and continue mixing with a whisk until the oil is well incorporated into the batter or you can use an electric stand mixer, attached with a balloon whisk, and mix until you get a smooth batter about 1 minute or so on low speed.
10. Leave the batter in the mixing bowl and let it sit and rest for about 20 minutes. This step is VERY IMPORTANT to let the flour absorbs all the liquid and moisture for even flavor and a better tasting cake. This step also replaces the traditional way of laborious kneading of the batter.
11. Preheat the steam oven to 100C (212F).
12. After 20 minutes, mix the batter again with a spatula because flour will fall to the bottom of the bowl again after a waiting period.
13. You MUST SIFT the batter again into a bowl. This will make sure you get a smooth cake after.
14. Pour the batter into an oiled steam proof pan. Flatten any bubbles on the top surface with a toothpick. Cover the pan with a foil paper or plate to prevent condensation drippings.
15. Steam for 1 hour to 1 ½ hour depending on the thickness of your batter in the pan. Prefer to over steam instead of under steam.
DO NOT steam on high heat to prevent bubbles formed on the top surface of your cake when done.
16. The cake is done when you stick a bamboo stick into the center of the cake and comes out clean.
17. Garnish with a red date by placing it in the center of the cake.
手動打蛋器 在 肥媽 Maria cordero Facebook 的精選貼文
屋企無晒蛋,個仔想食早餐,今日教大家無雞蛋無油的椰糖蒸糕👍👍
材料
📌 椰糖250克
📌 水175ml
📌 班蘭油2滴
📌 椰奶125ml
📌 麵粉300克
📌 泡打粉1茶匙
📌 梳打粉1/8茶匙
做法
1. 椰糖切碎,之後放入小鍋內,加入水,開慢火,邊煮邊用手動打蛋器攪拌椰糖,令椰糖溶掉。椰糖差不多溶掉,就要熄火,之後再攪勻直至椰糖完全溶掉及降溫。
2. 泡打粉和梳打粉放入麵粉內,拌勻。
3. 準備另一個鍋,把已溶掉的椰糖水過篩,如果篩上有未溶掉的椰糖,再用手動打蛋器在篩上攪拌至溶掉及冷卻些少。
4. 把椰奶全部倒入椰糖水內,攪拌均勻,再加入班蘭油,再攪拌均勻。之後把麵粉分兩三次用篩篩入椰糖內,不斷攪拌均勻,直到沒有粉粒。
5. 準備曲奇紙杯托(如曲奇紙杯托太軟身要用鐵杯托盛著),倒入椰糖漿,每杯大約8成滿,之後一杯杯放入大蒸籠內,再放入鍋內蒸20分鐘。即成。
高清版:https://youtu.be/BUgFFUbL1lI