雖然這篇台counter鄉民發文沒有被收入到精華區:在台counter這個話題中,我們另外找到其它相關的精選爆讚文章
在 台counter產品中有670篇Facebook貼文,粉絲數超過6萬的網紅Zojirushi 象印,也在其Facebook貼文中提到, 馬上就是午休時間了😍😍😍 大家平常中午選擇飯類時,會選擇白飯、糙米飯、還是什穀飯呢?? 其實近幾年來 #健康意識興起,加上 #生活型態的轉變 越來越多人選擇 #營養價值高 的米飯種類 ❗️當然❗️電子鍋也要一起跟著時代進步💪💪 頂級✨炎舞炊煮壓力IH電子鍋(NW-LAF10)✨ 除了有基本的白米...
同時也有223部Youtube影片,追蹤數超過60萬的網紅Tasty Japan,也在其Youtube影片中提到,見てくださいこの流れ落ちるチーズ、まるでナイアガラの滝や〜! マヌルとは韓国語でにんにく。 溶かしたガーリックバターをこれでもかというほど乗せて焼いているから、一口食べればそのまんまのネーミングに納得。 そしてパンの切れ目にはクリームチーズとモッツアレラチーズを容赦無く詰め込むという、罪すぎる作り方...
「台counter」的推薦目錄
- 關於台counter 在 Bernice Liu Instagram 的最佳解答
- 關於台counter 在 ??cuhk foodies x lo rowers?? Instagram 的精選貼文
- 關於台counter 在 Chao Yu Instagram 的最佳貼文
- 關於台counter 在 Zojirushi 象印 Facebook 的最佳解答
- 關於台counter 在 Zojirushi 象印 Facebook 的精選貼文
- 關於台counter 在 Facebook 的精選貼文
- 關於台counter 在 Tasty Japan Youtube 的最佳解答
- 關於台counter 在 生かし屋 IKASHIYA CULINARY ART Youtube 的最佳貼文
- 關於台counter 在 生かし屋 IKASHIYA CULINARY ART Youtube 的精選貼文
台counter 在 Bernice Liu Instagram 的最佳解答
2021-09-24 07:55:19
From the detailing of the counter made of cypress wood to create a comfortable atmosphere, to the lighting that brings warm shadows and lighting, I en...
台counter 在 ??cuhk foodies x lo rowers?? Instagram 的精選貼文
2021-09-17 11:05:18
台式鳳梨奶蓋阿薩姆紅茶 ($56) . 點解去到九月仲係咁熱🥵🥵 行完尖沙咀海旁入K11 musea行下,發現呢間位於一樓嘅salon原來有個counter賣飲品😍 即刻睇下有咩凍飲,店員話呢度嘅珍珠奶茶同草本茶都好受歡迎,但小編最後都係比期間限定嘅鳳梨奶蓋茶吸引左。 呢度嘅茶飲即叫即製,茶底係阿...
台counter 在 Chao Yu Instagram 的最佳貼文
2021-09-16 10:41:44
雖然是小櫃位 但為了這小櫃位也是付出不少心力 尤其是從晚上10點做到早上10點 基本是快要爆斃了🥲 #sloggi #underwears #counter #counterdesign #design #櫃位設計 #櫃位 #百貨 #新光三越 #內衣專櫃 #台中 #商業空間 #商業設計...
-
台counter 在 Tasty Japan Youtube 的最佳解答
2021-09-04 10:00:09見てくださいこの流れ落ちるチーズ、まるでナイアガラの滝や〜!
マヌルとは韓国語でにんにく。
溶かしたガーリックバターをこれでもかというほど乗せて焼いているから、一口食べればそのまんまのネーミングに納得。
そしてパンの切れ目にはクリームチーズとモッツアレラチーズを容赦無く詰め込むという、罪すぎる作り方…
まさに究極のガーリックパン。
「外側はカリッ、中はジュワ〜」なんてありきたりな言葉じゃ表しきれないほど、罪深い味が口いっぱいに広がります。
ガーリックバターはしょっぱいのに、クリームチーズは甘いんです。
甘しょっぱくて止まらないんです。
本当これは罪だ…もはや、カロリーなんてどうでもいい。
ぜひ作ってみてくださいね♪
巨大マヌルパン
2人分
材料:
強力粉 220g
薄力粉 20g
インスタントドライイースト 小さじ1
砂糖 大さじ2
お湯(人肌程度に温める) 70cc
牛乳(人肌程度に温める) 100cc
塩 小さじ1/3
バター(室温に戻しておく) 15g
■チーズクリーム
Aクリームチーズ(室温に戻しておく) 120g
A砂糖 20g
モッツァレラチーズ(スライス切り) 100g
■ガーリックソース
バター(電子レンジで加熱して溶かしておく) 100g
おろしにんにく 小さじ2
粗びき黒コショウ 小さじ1/2
牛乳 大さじ1/2
マヨネーズ 大さじ1/2
溶き卵 1/2個
ドライパセリ 小さじ1/2
バター(飾り用) 20g
作り方:
1.大きめのボウルに、強力粉、薄力粉を入れて木ベラで全体を混ぜ合わせ、半量を別のボウルに取り出しておく。
2.片方のボウルに、インスタントドライイースト、砂糖をのせ、インスタントドライイーストの上にお湯、牛乳をかけ、全体をよく混ぜる。
3.もう片方のボウルの粉と、塩、バターを加え、木ベラで全体を練るように混ぜ、ひとまとまりになったら台の上に取り出し、全体がつるんとなるまで手でこねる。
4.丸めてボウルに入れ、ラップをし、オーブンの発酵機能(40度)で30分発酵させる。(1次発酵)
5.チーズクリームを作る。
ボウルにAを入れてよく混ぜ合わせておく。大さじ1分、取り分けておく。
6.ガーリックソースを作る。
ボウルに材料を全て入れ、泡立て器でしっかりと混ぜる。
7.(4)の生地を軽く手でつぶし、包み込むように丸め直し、クッキングシートを敷いた天板に置き、ラップ、濡れ布巾をかけて15分ほど生地を休ませる。
8.濡れ布巾を取り、ラップをしたまま、オーブンの発酵機能(40度)で25分発酵させる。(2次発酵)
9.オーブンを200度に予熱する。
10.生地に強力粉(分量外)を茶こしなどを使ってふり、ナイフで切り目を入れて、予熱したオーブンで15〜20分程焼く。
11.焼成後、粗熱が取れたパンに対角線上に6等分に切り込みを入れ、チーズクリームを塗り込み、モッツアレラチーズを挟む。
12.ガーリックソースを上にかけ、(5)の取り分けておいたチーズクリームを中央にのせ、200度のオーブンで7〜10分ほど焦げないように様子見しながら焼いて完成!
===
Giant Cream Cheese Garlic Bread: A Taste of Sin…
Servings: 2
INGREDIENTS
220g bread flour
20g flour
1 teaspoon instant dry yeast
2 tablespoons sugar
70cc warm water (body temperature)
100c milk (body temperature)
1/3 teaspoon salt
15g butter (room temperature)
◆Cheese Cream
120g cream cheese (room temperature)
20g sugar
100g mozzarella cheese (sliced)
◆Garlic Sauce
100g butter (melted in microwave)
2 teaspoons grated garlic
1/2 teaspoon black pepper
1/2 tablespoon milk
1/2 tablespoon mayonnaise
1/2 beaten egg
1/2 teaspoon dried parsley
20g butter (for topping)
PREPARATION
1. Using a wooden spatula, combine bread flour and flour in a large bowl. Transfer half of it to another bowl.
2. Add dry yeast and sugar into the one of the bowls. Pour warm water and milk over dry yeast. Mix well.
3. Add the other half of flour, salt, and butter into the bowl (2). Mix with a wooden spatula until well combined. Transfer the dough to the kitchen counter and knead with hands until smooth.
4. Shape the dough into a ball and place in a bowl. Cover with a food wrap. Let the dough rise in a microwave (40°C: bread rise feature) for 30 minutes. (First rise)
5. For cheese cream: Mix cream cheese and sugar well in a bowl. Separate 1 tablespoon of it in a plate.
6. For garlic sauce: Mix all ingredients for the sauce in a bowl with a hand mixer.
7. Punch the dough (4) and shape into a ball. Place the dough on a pan lined with a parchment paper. Cover with a food wrap and a wet kitchen towel. Let it rest for 15 minutes.
8. Remove the towel (keep the food wrap). Let the dough rise in a microwave (40°C: bread rise feature) for 25 minutes. (Second rise)
9. Preheat the oven to 200°C (392°F).
10. Dust some bread flour and slash the dough. Bake in the oven for 15 to 20 minutes. Let cool.
11. Cut 6 slits in the bread. Spread cheese cream. Put mozzarella cheese in the slits.
12. Pour the garlic sauce over the bread. Place 1 tablespoon of cheese cream (5) on top. Bake in the oven at 200°C (392°F) for 7 to 10 minutes. (Keep an eye on, It easily gets burnt.)
13. Enjoy!
#TastyJapan
#レシピ
MUSIC
Licensed via Audio Network![post-title]()
-
台counter 在 生かし屋 IKASHIYA CULINARY ART Youtube 的最佳貼文
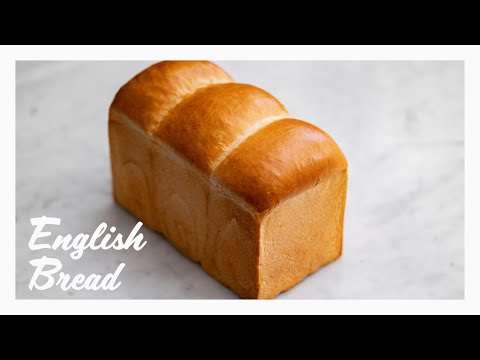
2021-09-03 18:36:29ストレート法で作る基本の山食パン(山型食パン・イギリス食パン)の作り方です
ストレート法は最初から材料をすべて合わせる作り方で、
メリット:短時間で出来る、風味が良い
デメリット:ボリュームが出にくい、でんぷんの老化がはやい=すぐぱさつく
という特徴があります
おすすめの強力粉は窯伸びの良い「スーパーキングやゴールデンヨット」、老化が遅く風味もいいし窯伸びもいいし作業もしやすい「ベルムーラン」がおすすめです(動画ではベルムーランを使用)
【型生地比容積について】
自分の持っている型に合わせて生地量を調整します
1.5斤と書かれてても1.2斤しかなかったり、型によって全然違うので必須です
この型と容量と生地の比率を型生地比容積といいます
型の容量÷型生地比容積=生地量
例:1625ml(1斤弱)÷3.5=約464g
3つに分けて入れる場合は1つあたり464÷3=155gになります
型生地比容積の目安
角食:3.8~4
山食:3.6前後
(数字が大きいほどふわふわで、数字が小さいほどみっちり)
ベーカーズパーセントと比容積からレシピの調整も出来ますが、
計算が面倒なので粉300gとか多めに作って生地量を食パンに使い
残りの生地は丸パンなどにすると楽だし無駄になりません
型生地比容積についてより詳しくは↓
https://www.ikashiya.com/entry/katakiji-hiyouseki
【材料】
ベーカーズパーセント(合計:194)
・強力粉 100
・砂糖 8
・スキムミルク 3
・塩 2
・インスタントドライイースト 1
・水 72
・バター 8
粉300での分量(1斤目安)
・強力粉 300g
・砂糖 24g
・スキムミルク 9g
・塩 6g
・インスタントドライイースト 3g
・水 216g
・バター 24g
【準備】
・バターを常温においておく
・型に離型油を塗る
【作り方】
1. 【生地作り~1次発酵】バター以外の材料をすべて合わせてグルテン膜が出るまでこね、バターを加えてさらにこねる
2. より薄いグルテン膜が出るまでこね(こね上げ26℃目安)、丸めてボウルに入れてラップをし30℃で60分発酵させて、打ち粉をして台に取り出す
3. 上から押さえてガスを抜いて広げ、上下左右から3つ折り×2で折りたたみボウルに入れてラップをし、30℃で30分発酵させる
4. 【分割~ベンチタイム】生地量の1/3ずつに分割してガスを抜き、きれいな面が外側にし表面を張らせるように丸める
5. かたく絞った濡れ布巾をかけて25分ベンチタイム(生地をゆるめて成形しやすくする/残った生地は同様にして丸パンなどに活用)
6. 【成形~2次発酵】めん棒で長方形にのばしつつガスを抜き(周りの気泡は手で潰す)、上下から1/3折りたたんで生地をくっつける
7. 奥から手前に少し張らせるように巻いてとじる(最初芯を作り、トップを持って下にくっつけるイメージで3回転~3回転半)
8. 離型油を塗った型に端→真ん中の順で入れ、蓋をして35℃で50分を目安に2次発酵(オーブンで発酵させる場合は予熱時間を考慮しはやめに取り出す)
9. 【焼成/180℃に予熱】生地が型のギリギリまで膨らんだら発酵完了、180℃に予熱したオーブンで焼成する
10. 180℃で30分を目安に焼き、焼き上がったら台に2~3回落として蒸気を抜き(腰折れを防ぐため)、すぐに取り出し冷ます
--------------------------------------------------------------------------
【動画でよく使ってる調理器具】
フライパン(20cm):https://amzn.to/2QyY1ny
フライパン(24cm):https://amzn.to/2UtNvz5
フライパン(24cm深型):https://amzn.to/3dj5DEp
鉄フライパン(22cm):https://amzn.to/3a8hqmR
アルミフライパン(24cm):https://amzn.to/3dj6tRz
片手浅型鍋(18cm):https://amzn.to/2QzGXha
片手浅型鍋(21cm):https://amzn.to/2U7ta3o
片手鍋(16cm):https://amzn.to/2QzCj2x
片手鍋(20cm):https://amzn.to/3bd0lZa
ソースパン:https://amzn.to/2U9keuI
まな板:https://amzn.to/2J1fQHI
ガスコンロ:https://amzn.to/3bdtvYa
牛刀:https://www.jikko.jp/fs/jikko/54803
ペティ:https://www.jikko.jp/fs/jikko/54800
撮影機材
カメラボディ:https://amzn.to/2xSXZAd
動画レンズ:https://amzn.to/3t7sfPB
写真レンズ:https://amzn.to/2U7HcCb
録音:https://amzn.to/2U9cGYT
※製品のURLはAmazonアソシエイトのリンクを使用しています
--------------------------------------------------------------------------
▼サブチャンネル(料理実験チャンネル)
https://www.youtube.com/channel/UCqIW0OHh8k2np5ZNz3wz8sg
▼ブログ
http://www.ikashiya.com/
▼Twitter
https://twitter.com/sakihirocl
▼Instagram
https://www.instagram.com/sakiyamahiroshi/
--------------------------------------------------------------------------
↓using translation software.
[Ingredients]
Bakers percent (total: 194)
・Bread flour 100
・Sugar 8
・Skim Milk 3
・Salt 2
・Instant dry yeast 1
・Water 72
・Butter 8
The amount of the flour 300.
・Bread flour 300 g
・Sugar 24 g
・Skim milk 9g
・Salt 6g
・Instant dry yeast 3g
・Water 216 g
・Butter 24 g
[Preparation]
・Leave the butter at room temperature.
・Spread mold release oil on the mold.
[How to make]
1. [Making the dough ~ primary fermentation] Mix all the ingredients except butter and knead it until the gluten film comes out. Add butter and knead it more.
2. Knead it (knead it up to around 26 °C) until a thinner gluten film comes out. Round it and put it in a bowl. Cover it with a plastic wrap and let it ferment for 60 minutes at 30 °C. Dust it with flour and take it out on a counter top.
3. Press down from the top to release the gas and spread it out. Fold it 3 times from top, bottom, left and right. Put it in a bowl and wrap it then ferment it for 30 minutes at 30 °C.
4. [Divide ~ bench time] Divide it to 1/3 of the amount of the dough then release the gas. Round it so the clean side is on the outside and the surface will stretch.
5. Cover it with a tightly squeezed damp dishcloth and bench it for 25 minutes (loosen the dough to make it easier to shape it/use the rest of the dough in the same way for round bread, etc.).
6. [Shaping ~ Secondary fermentation] Stretch it to a rectangle with a rolling pin and release the gas (crush the air bubbles around it with your hand). Fold it from the top and bottom to 1/3 and stick the dough together.
7. Roll it up and close it so that it is slightly stretched from the back to the front (Make the core first and hold the top and stick it on the bottom. Turn it around 3-3.5 times.).
8. Put it in the mold spread with mold release oil in the order of the edge to the center. Cover the lid and let it undergo secondary fermentation at 35 °C for around 50 minutes (take it out without considering the preheating time if you are fermenting it in the oven).
9. [Bake/Preheat to 180 °C] When the dough rises to the edge of the mold, the fermentation is complete. Bake it in the oven preheated to 180 °C.
10.Bake it at 180 °C for around 30 minutes. When it finishes baking, drop it on a counter 2 ~ 3 times to remove the steam (to prevent it from breaking around the waist). Take it out immediately and let it cool.![post-title]()
-
台counter 在 生かし屋 IKASHIYA CULINARY ART Youtube 的精選貼文
2021-08-07 17:55:231つの生地でいろいろ作れる惣菜パンのレシピ
ウインナーパン、ツナマヨパン、たまごハムパン等を作ってます
【材料】
生地
・強力粉 300g
・砂糖 30g
・スキムミルク 10g
・塩 5g
・インスタントドライイースト 3g
・水 204g
・バター 40g
たまごサラダ
・茹で卵 3個
・マヨネーズ 大さじ2
・オリーブオイル 大さじ1
・塩 ひとつまみ
・胡椒 少々
ツナマヨ
・ツナ缶 小1缶
・マヨネーズ 大さじ1
・塩 少々~ひとつまみ
・黒胡椒 少々
その他具材例
・ほうれん草やピーマンなど
・ベーコンやウインナーやハム
・チーズやマヨネーズ
【準備】
・バターを室温に置いておく
【作り方】
1. 【こね~1次発酵】生地のバター以外の材料を合わせてヘラで混ぜ、まとまったら台に取り出してこねていく
2. グルテン膜が出来るまでこねたらバターを加えてちぎるようにして馴染ませ、再び薄いグルテン膜が出来るまでこねる
3. 丸めてボウルに入れてラップをし、30℃で50分を目安に2倍ほどに膨らむまで1次発酵(指で粉を付けて穴をあけ、穴が少しだけ縮んで元に戻らなければOK)
4. 【具材の準備】ベーコンは1cm角にカットし、ほうれん草は熱湯でさっと茹でて流水で冷やし、しっかり水気を絞って2cmほどにカットする
5. 【分割~ベンチタイム】生地を1個60gずつに分割し、ガスを抜いて丸めてかたく絞った濡れ布巾をかけてベンチタイム15分
6. 【成形~2次発酵】
・楕円:手のひらで生地を円形で潰してのばし上下から1/3ずつ折りたたみ、さらに中心で折り合わせてとじる
・丸:ガス抜きして丸め直す
・ハム:ハムよりひと回り大きく手のひらで生地を円形で潰してのばし、ハムを置いてくるくると巻き、両端を合わせるように折ってとじ、縦にして端から1/3を残して切れ込みを入れて円形に広げる
7. オーブン用シートを敷いた天板に並べ、35℃で45分を目安に2次発酵(オーブンで発酵する場合、予熱時間を考慮しはやめに取り出す)
8. 【焼成/220℃に予熱】
・楕円:カミソリやナイフで中心に切れ込みを入れ、上に具材をのせる
・丸:頂点にハサミで十字に切れ込みを入れ、少し広げて具材をのせる
・ハム:上にチーズやたまごサラダをのせる(シンプルにそのまま焼いてもOK)
(照りを出したい場合、好みで溶いた全卵を塗る)
9. 220℃に予熱したオーブンで13分を目安に、底面に焼き色がつくまで焼いて出来上がり
--------------------------------------------------------------------------
【動画でよく使ってる調理器具】
フライパン(20cm):https://amzn.to/2QyY1ny
フライパン(24cm):https://amzn.to/2UtNvz5
フライパン(24cm深型):https://amzn.to/3dj5DEp
鉄フライパン(22cm):https://amzn.to/3a8hqmR
アルミフライパン(24cm):https://amzn.to/3dj6tRz
片手浅型鍋(18cm):https://amzn.to/2QzGXha
片手浅型鍋(21cm):https://amzn.to/2U7ta3o
片手鍋(16cm):https://amzn.to/2QzCj2x
片手鍋(20cm):https://amzn.to/3bd0lZa
ソースパン:https://amzn.to/2U9keuI
まな板:https://amzn.to/2J1fQHI
ガスコンロ:https://amzn.to/3bdtvYa
牛刀:https://www.jikko.jp/fs/jikko/54803
ペティ:https://www.jikko.jp/fs/jikko/54800
撮影機材
カメラボディ:https://amzn.to/2xSXZAd
動画レンズ:https://amzn.to/3t7sfPB
写真レンズ:https://amzn.to/2U7HcCb
録音:https://amzn.to/2U9cGYT
※製品のURLはAmazonアソシエイトのリンクを使用しています
--------------------------------------------------------------------------
▼サブチャンネル(料理実験チャンネル)
https://www.youtube.com/channel/UCqIW0OHh8k2np5ZNz3wz8sg
▼ブログ
http://www.ikashiya.com/
▼Twitter
https://twitter.com/sakihirocl
▼Instagram
https://www.instagram.com/sakiyamahiroshi/
--------------------------------------------------------------------------
↓using translation software.
[Ingredients]
[Ingredients]
dough
・Bread flour 300 g
・Sugar 30 g
・Skim milk 10 g
・Salt 5g
・Instant dry yeast 3g
・Water 204 g
・Butter 40 g
Egg salad
・Boiled eggs, 3 pieces
・2 tablespoons mayonnaise
・Olive oil 1 tablespoon
・a pinch of salt
・a pinch of pepper
Tuna Mayonnaise
・small can of tuna
・1 tablespoon mayonnaise
・a pinch of salt
・a pinch of black pepper
Examples of other ingredients
・Spinach, green pepper, etc.
・Bacon, wiener sausages, ham
・Cheese or mayonnaise
[Preparation]
・leave the butter at room temperature
[How to make]
1. [Knead ~ Primary fermentation] Mix all the ingredients except the butter of the dough together with a spatula. Take it out on a counter and knead it.
2. Knead it until the gluten film is formed then add butter and tear it to mix it together. Knead it again until a thin gluten film is formed.
3. Round it and put it in a bowl then wrap it. Let it undergo primary fermentation at 30 °C for around 50 minutes until it expands to around 2 times its size (Dust it with your finger and make a hole. It will be fine if the hole shrinks a bit and it doesn't return to its original shape.).
4. [Preparation of the ingredients] Cut the bacon into 1cm cubes, quickly boil the spinach in hot water and cool it under running water, squeeze out the moisture well and cut it into 2cm pieces.
5. [Divide ~ bench time] Divide the dough to 60 g each. Release the gas and round it. Cover it with a tightly squeezed damp dishcloth and bench time is 15 minutes.
6. [Shaping ~ Secondary Fermentation]
・Ellipse: Crush the dough into a circle with your palm and stretch it. Fold it from the top and bottom 1/3 at a time. Fold it in the center and close it.
・Round: Release the gas and round it again.
・Ham: Crush and stretch the dough in a circle with the palm of your hand one size larger than the ham. Place the ham and roll it up. Fold it so that both ends are joined. Make it vertical and make a cut leaving 1/3 from the edge and spread it out in a circle.
7. Line them up on a baking sheet covered with baking paper. Let it undergo secondary fermentation at 35 °C for around 45 minutes (When fermenting in the oven, take it out without considering the preheating time.).
8. [Baking/Preheating to 220 °C]
・Ellipse: Make a cut in the center with a razor or knife and place the ingredients on top.
・Round: Make a cross cut on the top with scissors, spread it out a little and put the ingredients on it.
・Ham: Top with cheese or egg salad (or simply bake)
(If you want to make it shiny, apply beaten whole egg if you like.)
9.Bake it in the oven preheated to 220 °C for around 13 minutes until the bottom browns and it will be complete.![post-title]()


台counter 在 Zojirushi 象印 Facebook 的最佳解答
馬上就是午休時間了😍😍😍
大家平常中午選擇飯類時,會選擇白飯、糙米飯、還是什穀飯呢??
其實近幾年來 #健康意識興起,加上 #生活型態的轉變
越來越多人選擇 #營養價值高 的米飯種類
❗️當然❗️電子鍋也要一起跟著時代進步💪💪
頂級✨炎舞炊煮壓力IH電子鍋(NW-LAF10)✨
除了有基本的白米、什穀米、糙米炊煮功能
並增加 #台灣限定 開發 #黑米& #藜麥炊煮行程☝️
讓重視米飯口感的你,同時又能夠兼顧健康!!!
💁♀️:阿編最近迷上黑米香味與口感,超美味大家一定要試試看
阿編幫大家整理好各種米食的健康價值小檔案唷~
一起點開下圖看看哪一些米食適合你唷❤❤❤
📌銷售據點
象印專櫃🔗 https://www.zojirushi.com.tw/brand-counter
象印官網介紹&販賣🔗https://www.zojirushi.com.tw/NW-LAF10/
#象印 #zojirushi #炎舞炊煮 #電子鍋 #頂級 #業界首創 #台灣獨創 #日常生活 #米飯 #生活道具 #美味 #大火力 #壓力IH #健康穀物
台counter 在 Zojirushi 象印 Facebook 的精選貼文
#準備到睡覺時間了
#今天阿編準備一個空氣清淨機的床邊故事🛌
#欸不是拉是睡覺時大家會在意的事😎
大家每天待在臥室最久的時間,就是 #睡覺 的時候了
相信每個人對於要擁有 #優質的睡眠,應該都會有一點小小的堅持
例如阿編非常堅持睡覺一定要 #全暗➕ #沒有噪音
一咪咪的燈光跟聲音都不行的那種🤣
所以這一台 #比圖書館還安靜 的空氣清淨機真的很深得阿編心
晚上調靜音模式只有✨19分貝✨無聲濾靜不擾眠❤️
另外,也很在意就是室內空氣的品質☝️☝️
尤其是 #過敏體質 的阿編,如果房間有灰塵或塵蟎
就很容易會流鼻水跟打噴嚏💦
所以需要能夠每天幫自己 #監測房間空氣品質 的空氣清淨機
這時候可能大家心中就會開始出現一些疑問
如果 #每一天都開著空氣清淨機會不會很耗電呢?
NoNoNo~~((搖手指
貼心的象印已經幫大家算好了!!
就算你 #每天24小時開啟,一年的電費只要❗️350.4元❗️
就可以換來每天舒適清新的空氣🙌
阿編也貼心附上 #清淨時間一覽表,大家可以點下圖參考自己的房間坪數大概多久時間就可以淨化唷!!
好了~阿編要下線去我清新的房間睡覺了😆
大~家~晚~安~🌃
空氣清淨機限定活動✨好禮大放送✨
凡購買象印空氣清淨機,上官網登錄,#前500名 及贈送 #空氣清淨機濾網1份
🙋♀️:象印空氣清淨機的濾網在正常使用狀況下,可使用2年。早買早登錄,再拿一份新的濾網,#未來4年都不用煩惱❤️❤️❤️
📌活動詳情: https://bit.ly/38EuuS6
📌銷售據點(象印專櫃):https://www.zojirushi.com.tw/brand-counter
#象印 #ZOJIRUSHI #空氣清淨機 #極靜省 #NEW #過敏 #空汙 #抵抗力 #肺炎 #居家生活 #大風量 #一級省電 #歐洲防敏認證協會 #ECARF #睡眠品質 #圖書館
台counter 在 Facebook 的精選貼文
近年少有一個好萊塢男星竄升的速度的像奧斯卡.伊薩克(Oscar Isaac)那般快。
.
18歲就出道的他,直到33歲之前,都還是一般人喊不出名字的二、三線配角。不過其實這位出生瓜地馬拉的男星,早在2006年就已經獲得演到電影男主角,早期也曾出演過一些佳作,只是也許隨著年紀增長、越沉越香的熟男韻味,才終於使他獲得矚目。不僅在2015年加盟《星戰 Star Wars》家族,也在2016年加入《X戰警 X-Men》行列,現在也確定將成為漫威宇宙第四階段的關鍵人物。
.
如果你還對他的生涯歷程不熟,想要趁機補補他的作品,最近是大好機會,他領銜主演的《算牌手 The Card Counter》(2021)和《沙丘 Dune》(2021)都在近期在台上映。至於他還有什麼不為人知的演出經歷,以及值得推薦的好片,請點下方連結。不僅是憂鬱歌手、沉穩特務還是古怪獄卒,通通難不倒他。本文將介紹他五部代表之作。
.
還可以推薦我其它奧斯卡伊薩克主演的好片嗎?
.
https://lihi1.com/jhB00
ez訂 專題∣《沙丘》,《算牌手》之外!五部奧斯卡伊薩克主演電影推薦
#OscarIsaac #沙丘 #算牌手 #奧斯卡伊薩克 台北双喜電影 #華納兄弟